It’s natural not to have any clue why the Windows 11 PC crashes out of the blue. However, if you have installed a new driver for web camera or updated unstable GPU drivers, it’d help to troubleshoot that first. Otherwise, you can begin troubleshooting.
1. Shut Down Your PC
When was the last time you shut down your PC properly? If you run Windows 11 on a laptop, you should shut down Windows 11 properly before the crash occurs. Click on the Start icon on the taskbar, hit the Power button, and select Shut down. Once your computer shuts down completely, turn it on to check if the crashing issue exists.
2. Check RAM
First, you should make sure that your PC has enough RAM to run tasks smoothly. If you have a computer with limited memory (about 4GB), your computer may keep crashing or restarting to free up the RAM. Here’s how you can check available RAM on Windows 11. Step 1: Press the Windows key and search for Resource Monitor. Hit Enter and open the tool. Step 2: Check available physical memory.
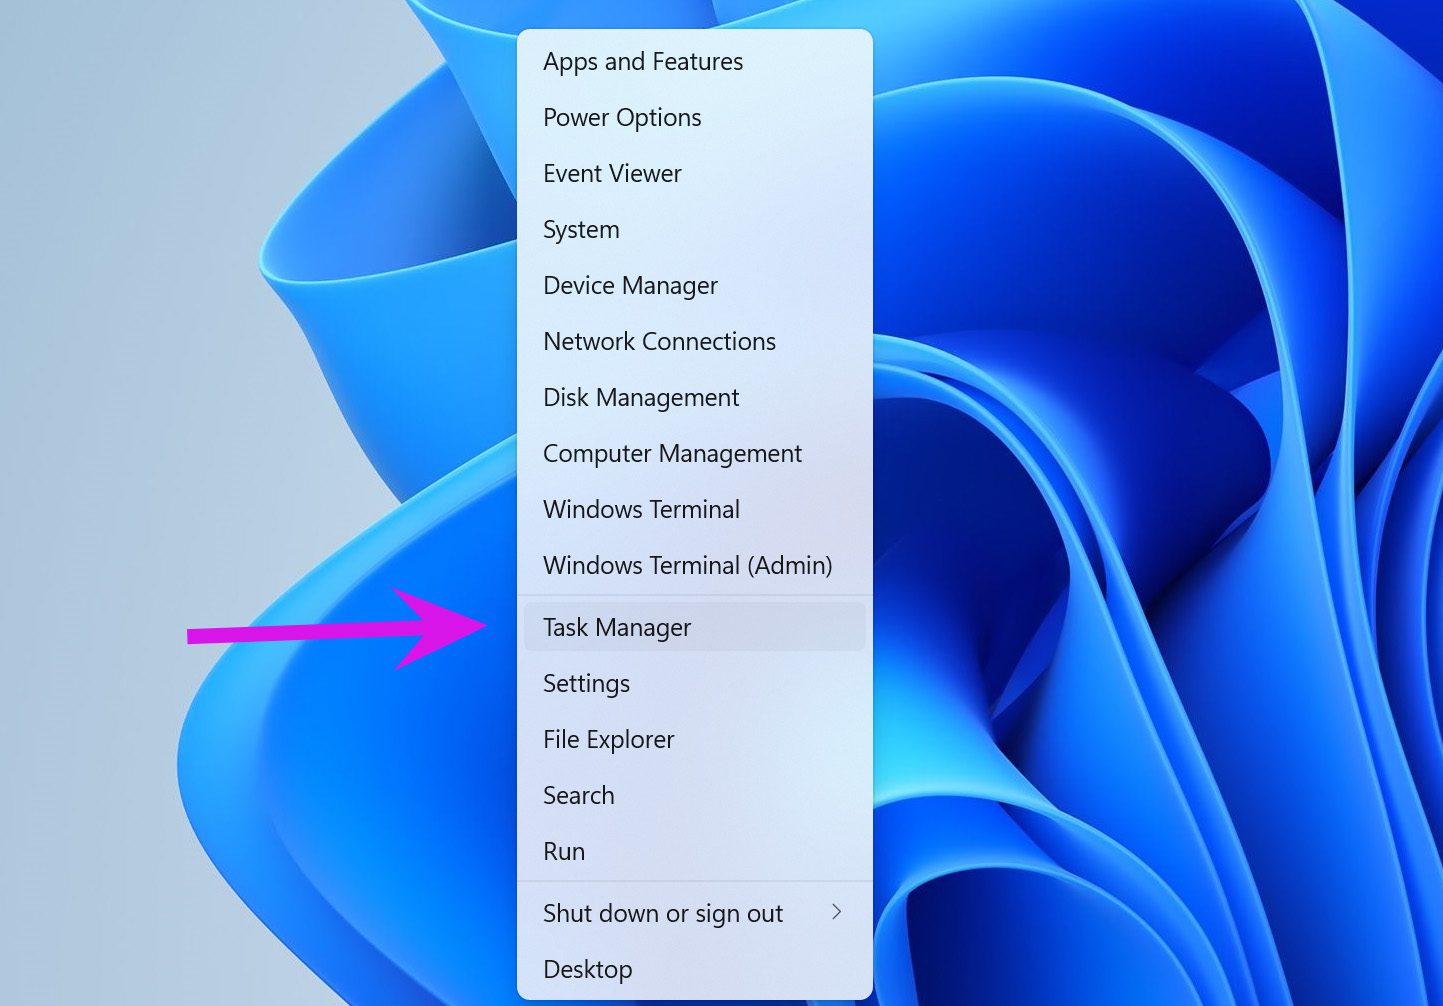
If you are indeed dealing with less RAM, you need to close irrelevant apps and services running in the background. Step 1: Right-click on the Windows key and select Task Manager.
Step 2: Select apps that you no longer need to run, click on them, and select the End task button at the bottom.
You should also disable irrelevant apps launching at Windows 11 startup. The PC will have more RAM for you to utilize.
3. Inspect Any Issues with RAM
Any problem with installed RAM can lead to a crashing issue on Windows 11. Microsoft offers a memory diagnostics tool to inspect memory glitches. Step 1: Use Windows + R keys and open the Run menu. Step 2: Type mdsched.exe and hit the Enter key.
Step 3: From the Windows Memory Diagnostic menu, select ‘Restart now and check for problems’ option.
Make sure to save your work and close any open programs before restarting the computer. Once the PC reboots, it will run the diagnostic tool and inspect for any RAM issues on your computer. For those using a deskop, make sure you’ve put the physical RAM sticks properly in the slot.
4. Use Supplied Power Adapter
The bizarre trend of removing power adapters from the packaging hasn’t reached the PC market yet. Even if you have another Type-C adapter lying around, you should always opt for the supplied power adapter to charge your laptop.
Maybe your laptop requires at least 60-watt power and you might be charging it with a random 30-watt adapter and this mismatch can lead to slow charge and random reboots.
5. Cool Down Your Laptop
Long gaming sessions, heavy workflow with 4K video export, or 3D rendering can overheat your laptop. If the laptop fans are having difficulty dissipating all the warm air, the system overheats and shuts down to safeguard the components. Shut down your laptop and let it cool down. Once the temperatures are in check, you can start your laptop and resume work.
6. Replace CMOS Battery
CMOS (complementary metal-oxide-semiconductor) battery keeps BIOS powered on when the PC is unplugged. A normal CMOS battery lasts for 2-10 years. If the CMOS battery is running out of juice, it can lead to power on/off issues. It’s quite easier to replace a PC’s CMOS battery than on a laptop. Open the PC cabinet find the CMOS battery attached to your motherboard (it should look like a coin shape).
When you remove the battery, note the positive and negative sides so that you can add a new one correctly.
7. Update Display Drivers
First, you need to download relevant display drivers from the laptop maker’s website. Then follow the steps below to install them on your computer. Outdated display drivers can be the main culprit behind the blue or pink screen of death and other issues. Step 1: Right-click on the Windows key and open the Device Manager menu.
Step 2: Expand the Display adapter menu and find display drivers.
Step 3: Right-click on it and open the context menu. Select Update driver.
Ask Windows to search for drivers automatically on the PC and install the latest drivers.
8. Remove Malicious Files on PC
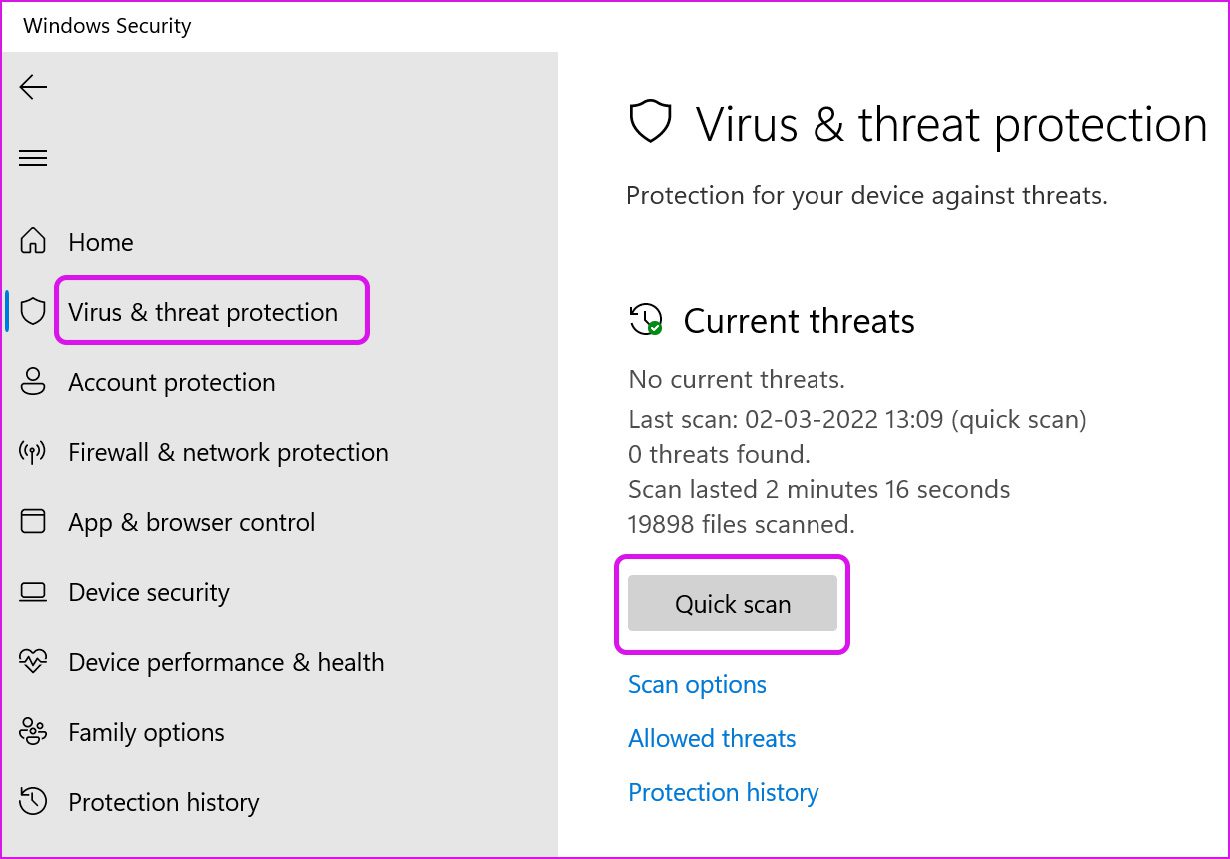
You might have infected your PC with bogus files over time. The issue is more apparent when you develop a habit of downloading software from unknown sources. Windows Security is one of the best tools to remove such malicious files on the computer. Let’s use it. Step 1: Press the Windows key and search for Windows Security. Step 2: Open the app and go to Virus and threat protection menu. Step 3: Run a Quick scan on your computer, and the tool will remove junk from your PC.
9. Update Microsoft Store Apps
Outdated apps on your computer can lead to crashing and rebooting as well. Open the Microsoft Store on your computer and go to the Library menu. Click on Get Updates and install the latest apps on your computer.
10. Update Windows 11
Microsoft rushed Windows 11 launch. The company releases new OS builds every few months to resolve initial bugs. Open the Windows Settings menu (use Windows + I keys) and go to the Windows Update menu to install the latest OS build.
11. Reset PC
If the Windows 11 still crashes even after trying all the solutions mentioned above, you’ll need to reset your PC. Step 1: Press Windows+i keys to open Settings on Windows 11. Step 2: Select System option from the left-columm and click Recovery on the right.
Step 3: Select Reset PC, and you have two options – keep your personal files or remove them.
You can either keep your files or remove everything from your computer. When you select Keep my files, the system will remove apps and settings only.
Get Work Done on Windows 11
Reliability isn’t the first thing that comes to mind when talking about Windows 11. While Microsoft is hard at work removing glitches from the OS experience, the tricks above will help you prevent your computer from crashing out of nowhere. Which trick worked for you to resolve the issue? Share your findings in the comments below. The above article may contain affiliate links which help support Guiding Tech. However, it does not affect our editorial integrity. The content remains unbiased and authentic.